Art Classes
Instructional DVDs
Art Tips
Step by Step
|
| Home | Main | Links | Site Map | Classroom |
Art Tips
 Preparing the Painting Surface
The following steps are intended to ensure that I have done everything in my power to guarantee the longevity and physical integrity of my paintings.
Furthermore, they allow me to achieve a truly smooth surface that lends itself to the style of painting that I do.
Here are the items you will need and a summary of the process involved:
|
|
1/4" Baltic birch plywood (preferred). If not available, you could settle for 1/4" hardboard / Masonite®. If using hardboard, buy the brown, untempered kind. |
|
|
GAC 100 (Golden Acrylic Colors) |
|
|
Gesso |
|
|
Sandpaper: #120 fine grit and #280 (or #400) grit wet sandpaper |
|
|
Paint brush: flat house painting brush (2" wide) |
|
|
Spray gun |
Once the wood has been cut into the preferred sizes (it is better to work on a few pieces at a time):
|
|
Sand the smoothest side of the panel (side A) with the #120 paper to roughen up the surface and remove any grease or dirt. |
|
|
Wipe the board with a damp cloth to remove any dust. |
|
|
Apply an isolation barrier (GAC 100) to protect the gesso layers from oils and glue in the board. To be extra safe, apply to both sides of the board. |
|
|
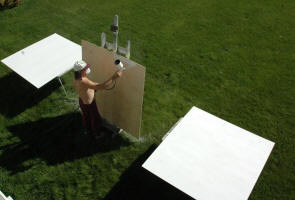
Apply a coat of gesso to side A and allow to dry. I prefer to use a spray gun to apply the gesso. The gesso should be diluted to the thickness of cream, not too runny. Thinning is best done by adding gloss or matte medium, itself thinned to a ratio of 75% medium and 25% water. |
|
|
Allow to dry and then sand with the #120 paper to remove any flecks of gesso, scratches, etc. |
|
|
Apply another coat of gesso on side A; allow to dry and sand. |
|
|
Turn the board over and gesso side B. Sanding is not necessary since this step is aimed only at preventing warping of the board. |
|
|
Repeat steps 4 to 7 twice more, until side A has six coats and side B has three. You could skip one coat on side B. |
|
|
Finish off side A with the wet sandpaper #280 (or #400) and water, until a smooth surface is achieved. |
Adding paint to the gesso will allow you to prepare a smooth panel already toned to the colour of your choice. I usually apply the coloured gesso to the top two coats. You are now ready to paint. Good luck!